My 200-500 was reliably missing focus at 500mm - jumping back and forth around focus in AF-C
All photos reported they were taken at 290mm.
Searching for problems with this lens I found lots of people discussing the zoom getting stuck but no-one seemed to have the same problem as me with focus at 500mm.
The Problem
Symptoms
- AF was skittish at 500mm (skipping back & forth)
- Resulting in basically all shots being slightly out of focus
- Focus at 400mm was good
- Focus at 300mm was perfect
- All photos said they were taken at 290mm
Cause
- Zoom sensor uses 4 tracks with prongs that slide over them depending on zoom.
- These tracks follow a binary-esque pattern of being conductive or not.
- This allows the lens to measure the mm based off which combination are electrically connected.
- Prongs were bent up and not making contact - at 290mm all 4 tracks are non-conductive, hence lens always reported 290mm, throwing off AF at other focal lengths
- Prongs towards front of camera were more bent
Cause of cause
- When extended, the entire front half of the lens from the zoom ring can slide forward a few mm - results in the prongs sliding perpendicular to the track.
- More likely the front of the lens sagging caused the prongs to bend (or a combination of both).
Solution
- Strip down lens from the back and bend prongs so they make contact
- Ensure to always properly support the front of the lens when it is extended
Tools / Materials
- Philips screwdrivers varying from small to very small
- Torch / lots of light highly recommended
- 6mm wide electrical tape (you can get away with wider, just you may need to cut down the width a bit which is messy)
- Small containers / segmented tray to keep the screws separate - there are probably at least 10 different types of screws in this :(
- Tweezers - the finer the better
Steps
Obviously do this at your own risk and take the usual precautions when dissassembling expensive electronics. I highly recommend watching this video as it shows most of the below process (but in reverse), and of course read through all the instructions before starting.
- Remove 3 screws on silver DSLR interface to remove plastic dust catcher
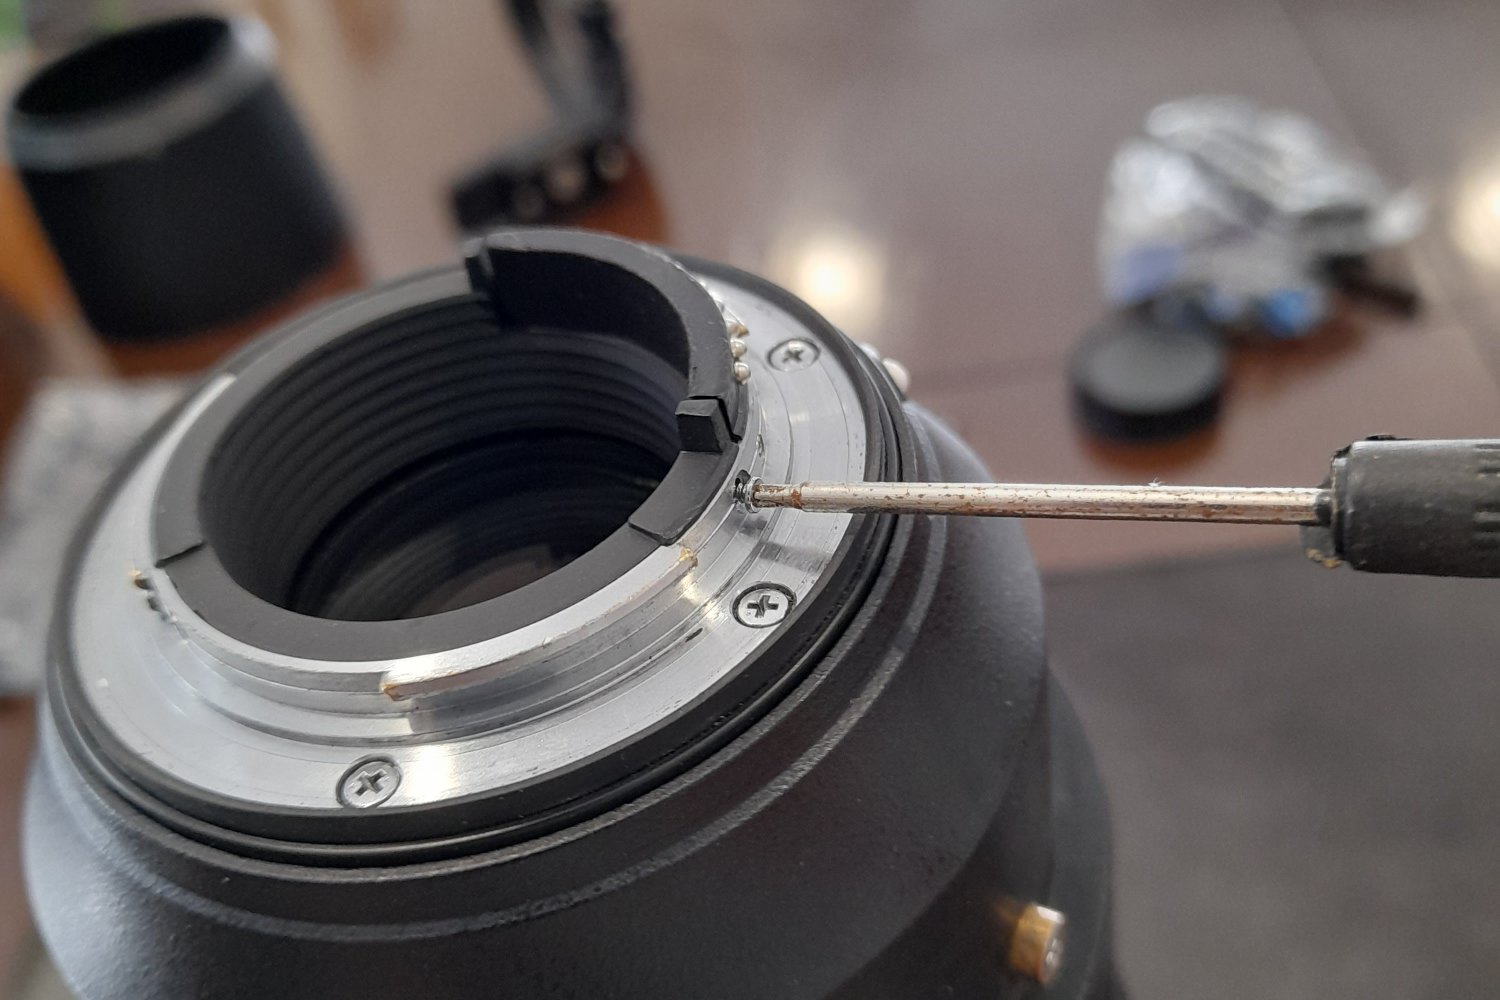
- Remove 2 smaller screws on same part to remove DSLR contacts
- Remove silver metal DSLR interface, noting that
- the two rubber bits on the outside are separate pieces
- there are 3 slim metal rings(ish) underneath
- when reassembling I poked the screws through this assembly before placing it on the lens to ensure the metal rings lined up
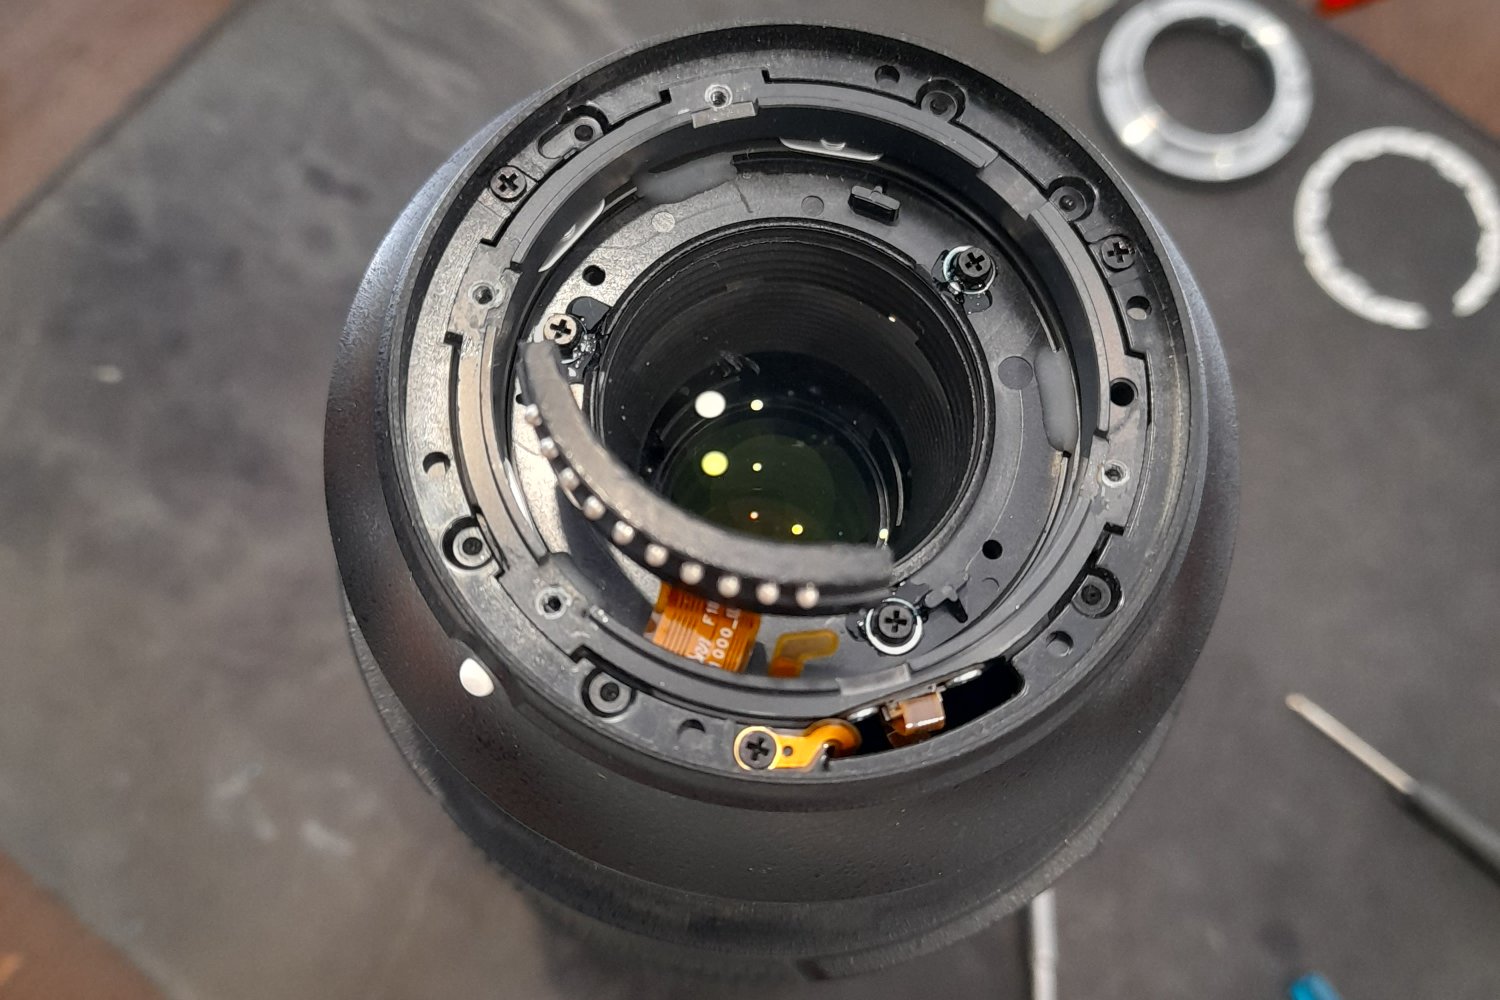
- Disconnect small flex cable at the top (just to the right of DSLR connector - this is for the switches on the outer housing)
- Remove 3 black screws (equally spaced around the top, one going through some flex cable)
- Remove 4 tripod mount screws on outside of lens body
- Slide off back housing
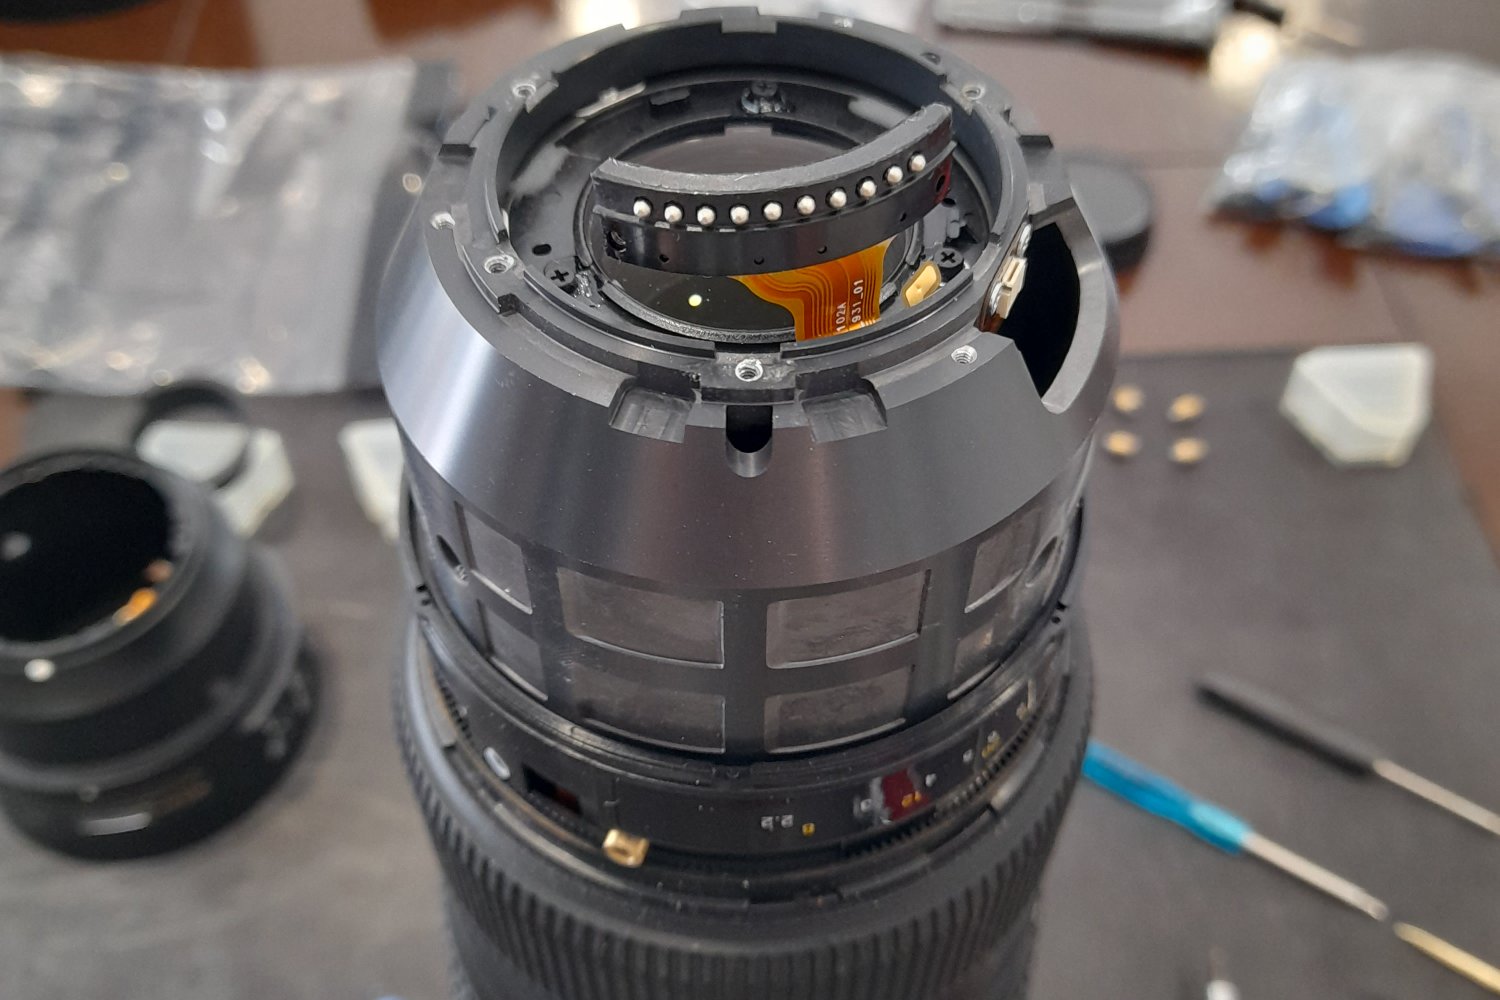
- Remove screw attaching focus indicator (inside plastic spacer) - careful to not apply too much pressure as the bottom doesn't seem to have much support
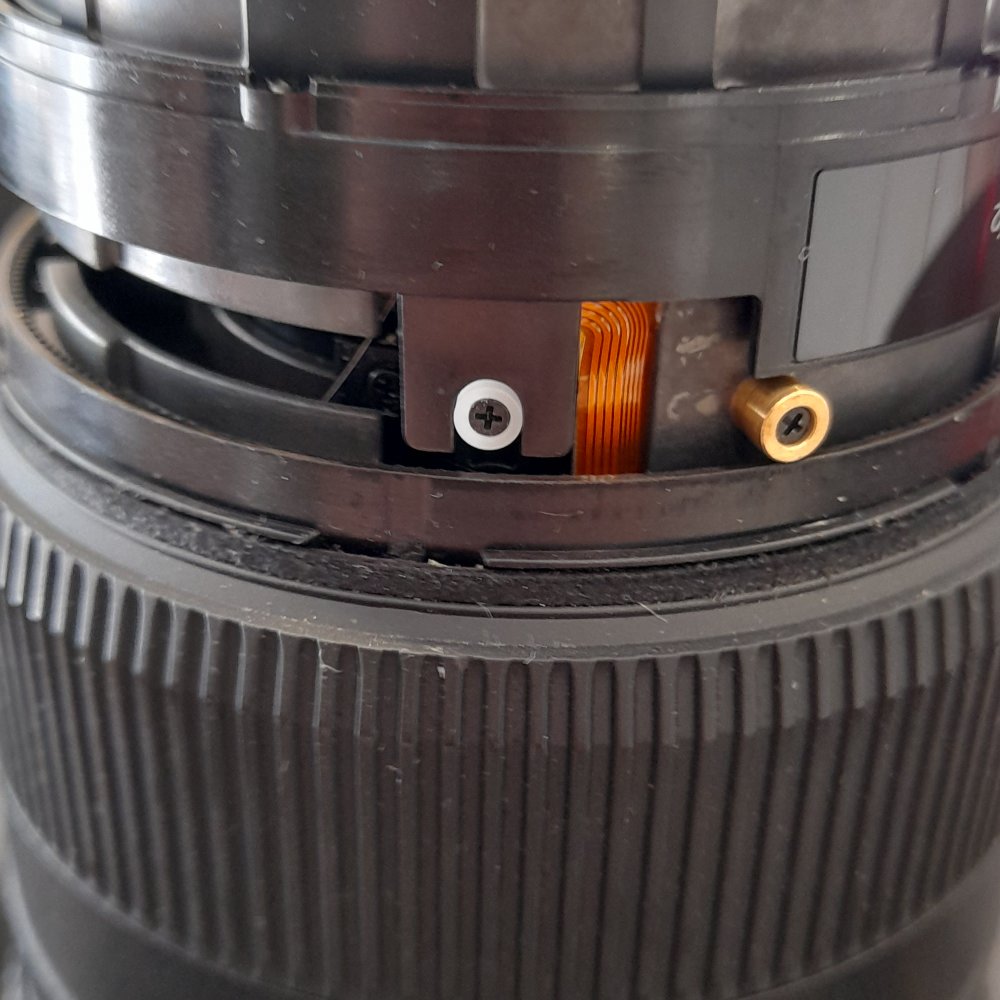
- Remove 3 brass spacers (held by black screws)
- Remove focus indicator - rotate it clockwise (to the left if the lens is sitting in front of you) and it should slide right off up at some point
- Remove focus ring
- Remove 2 screws holding flex cable connector (the one that connected to the outer housing for the switches)
- Remove 7 (I think) small black screws on silver interface holding the big metal piece - these should/might be fairly tight
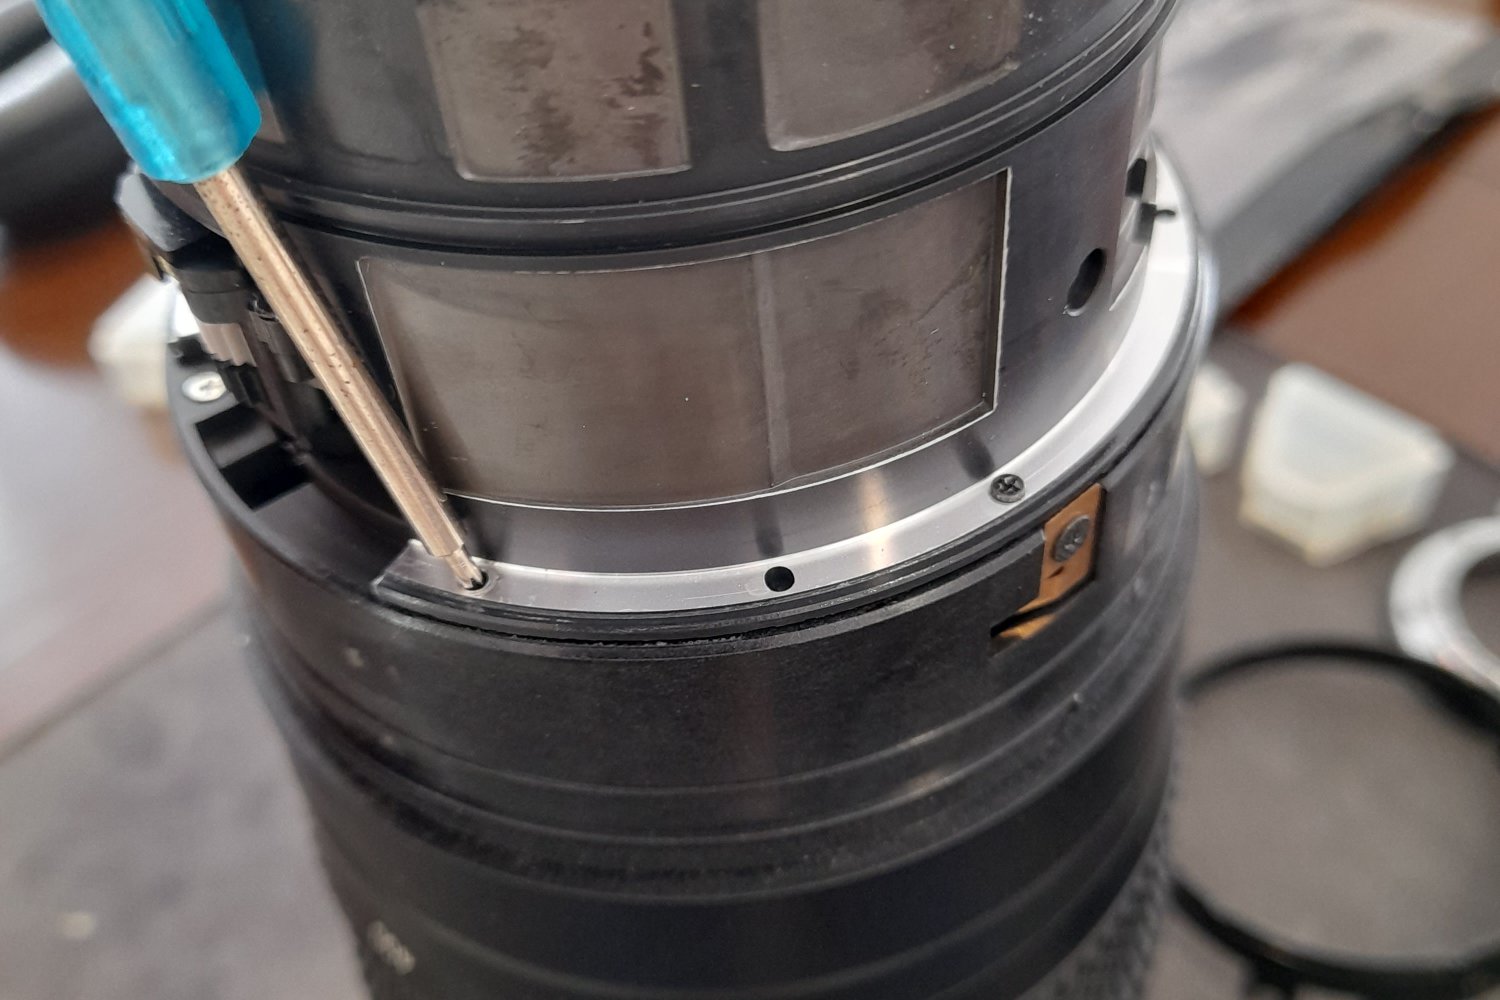
- Carefully slide of big metal piece (the PCBs are right underneath it) (Linked video starts here in reverse)
- Remove black screw holding small copper piece (it'll just come right off now) (when reassembling check this has direct contact through the entire zoom range to the silver ring underneath it)
- Remove 4 sliver screws holding plastic cover
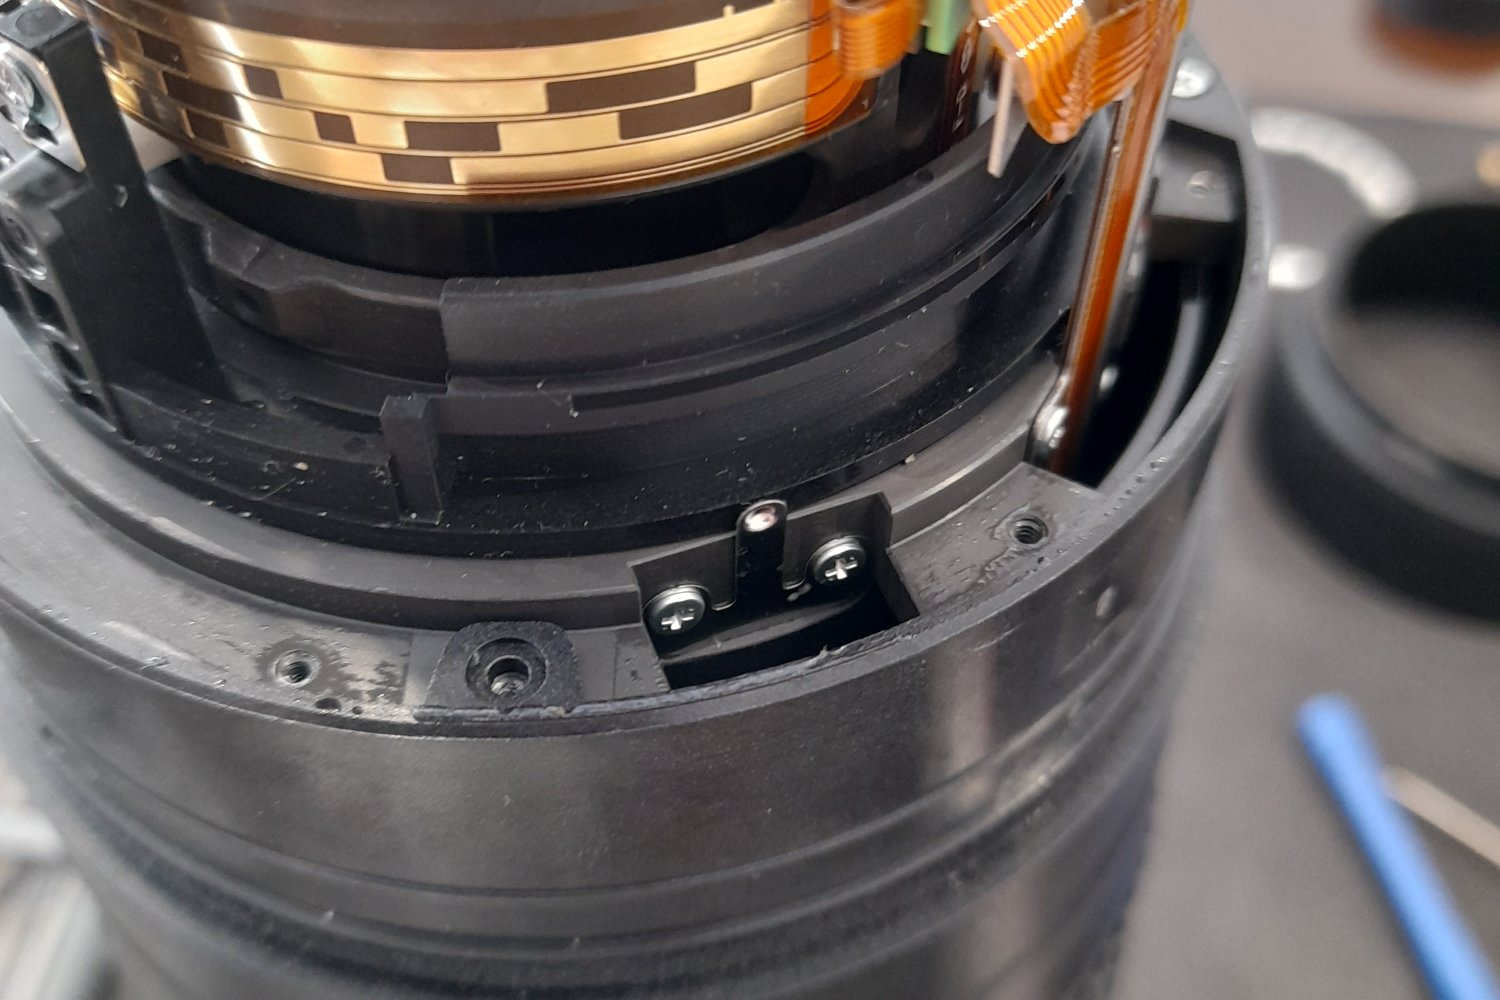
- Remove plastic cover
- Right below the gears which drive the focus they'll be a slot
- Shine a torch in here and you'll see the tracks for the zoom sensor
- Zoom in to ~300mm and you'll see the prongs
- If they aren't quite touching this is your problem
- Remove electrical tape
- Half remove top layer of orange tape - this is connected to the metal plate so just peel it back enough so you can fold it back
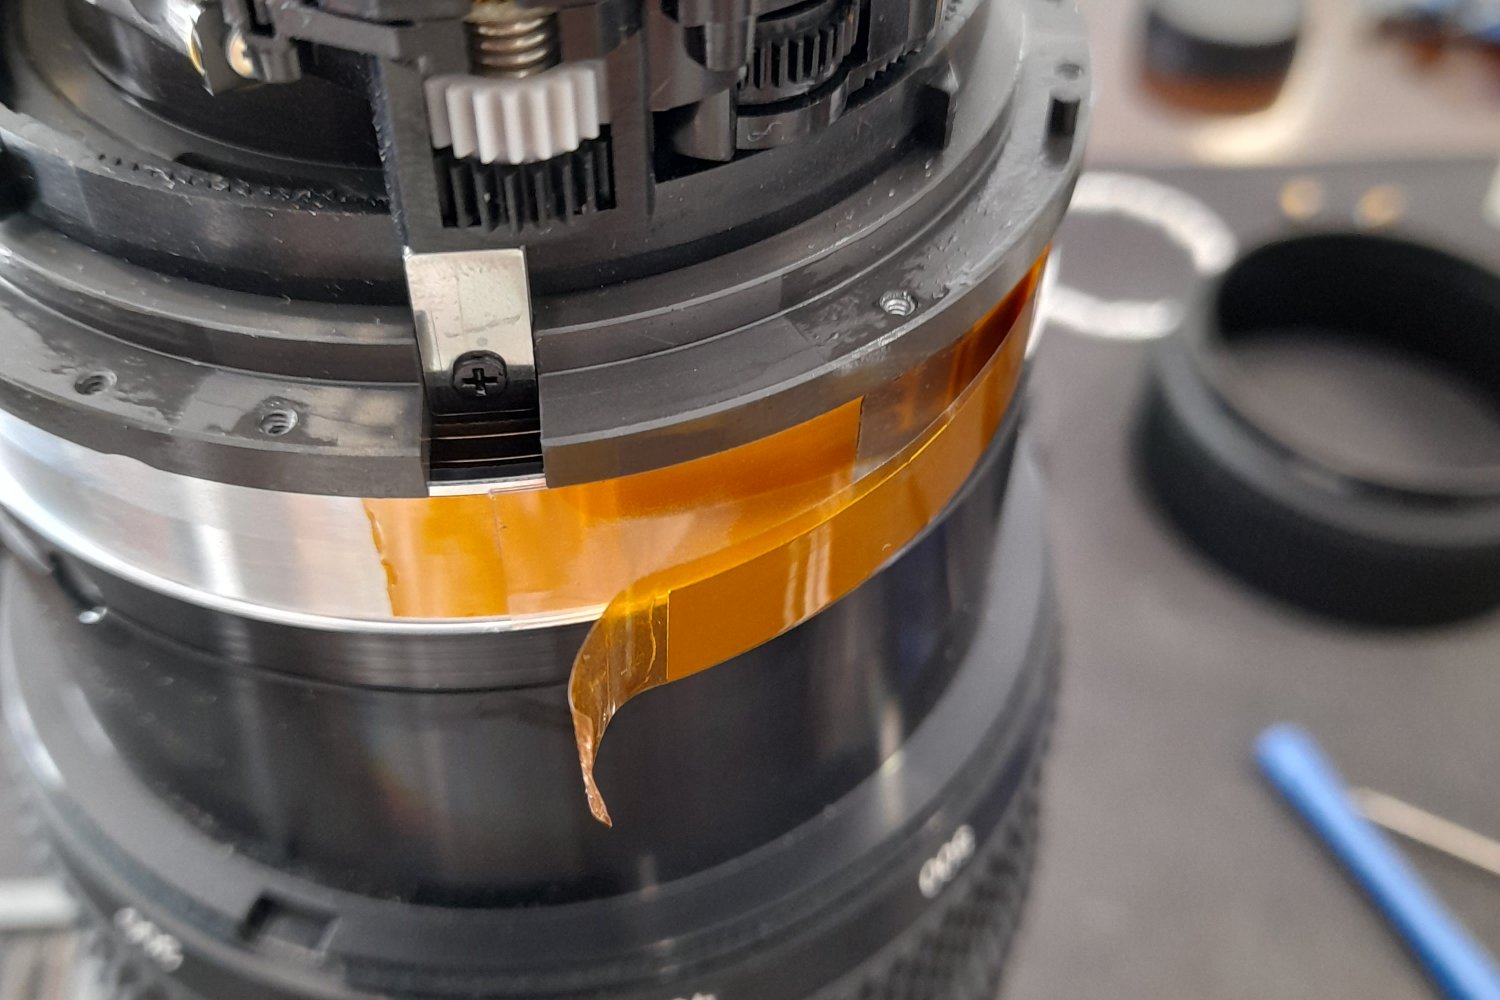
- You should have a clearer view of the prongs through the window now to double check
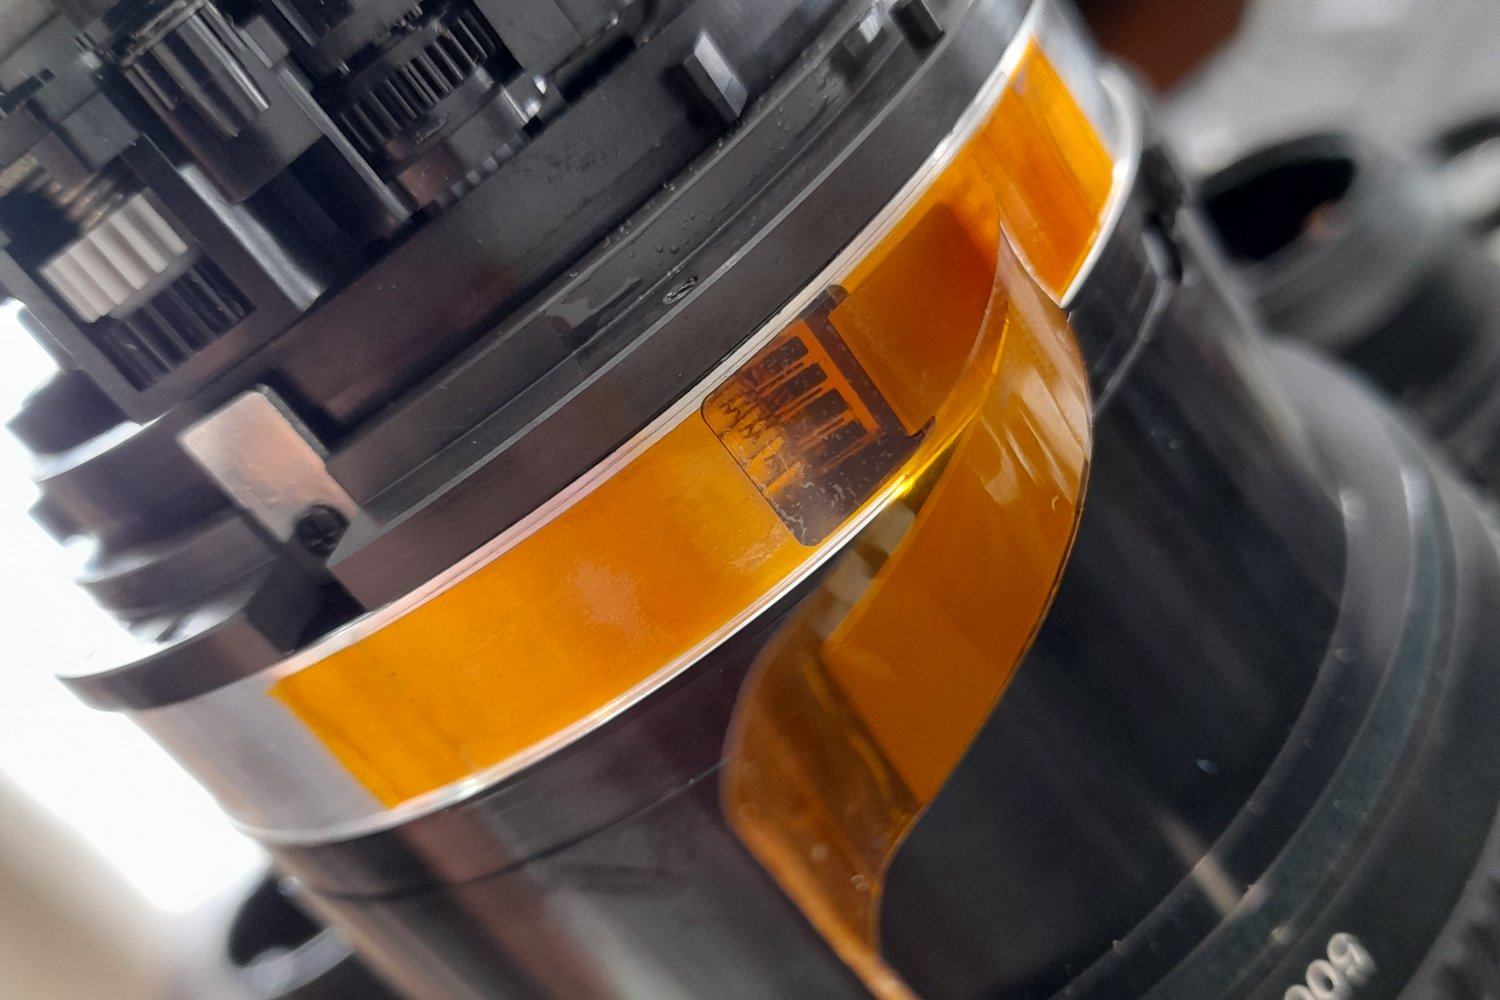
- You should have a clearer view of the prongs through the window now to double check
- Half remove next layer of orange tape (with the thick clear tape) - until the prongs come back
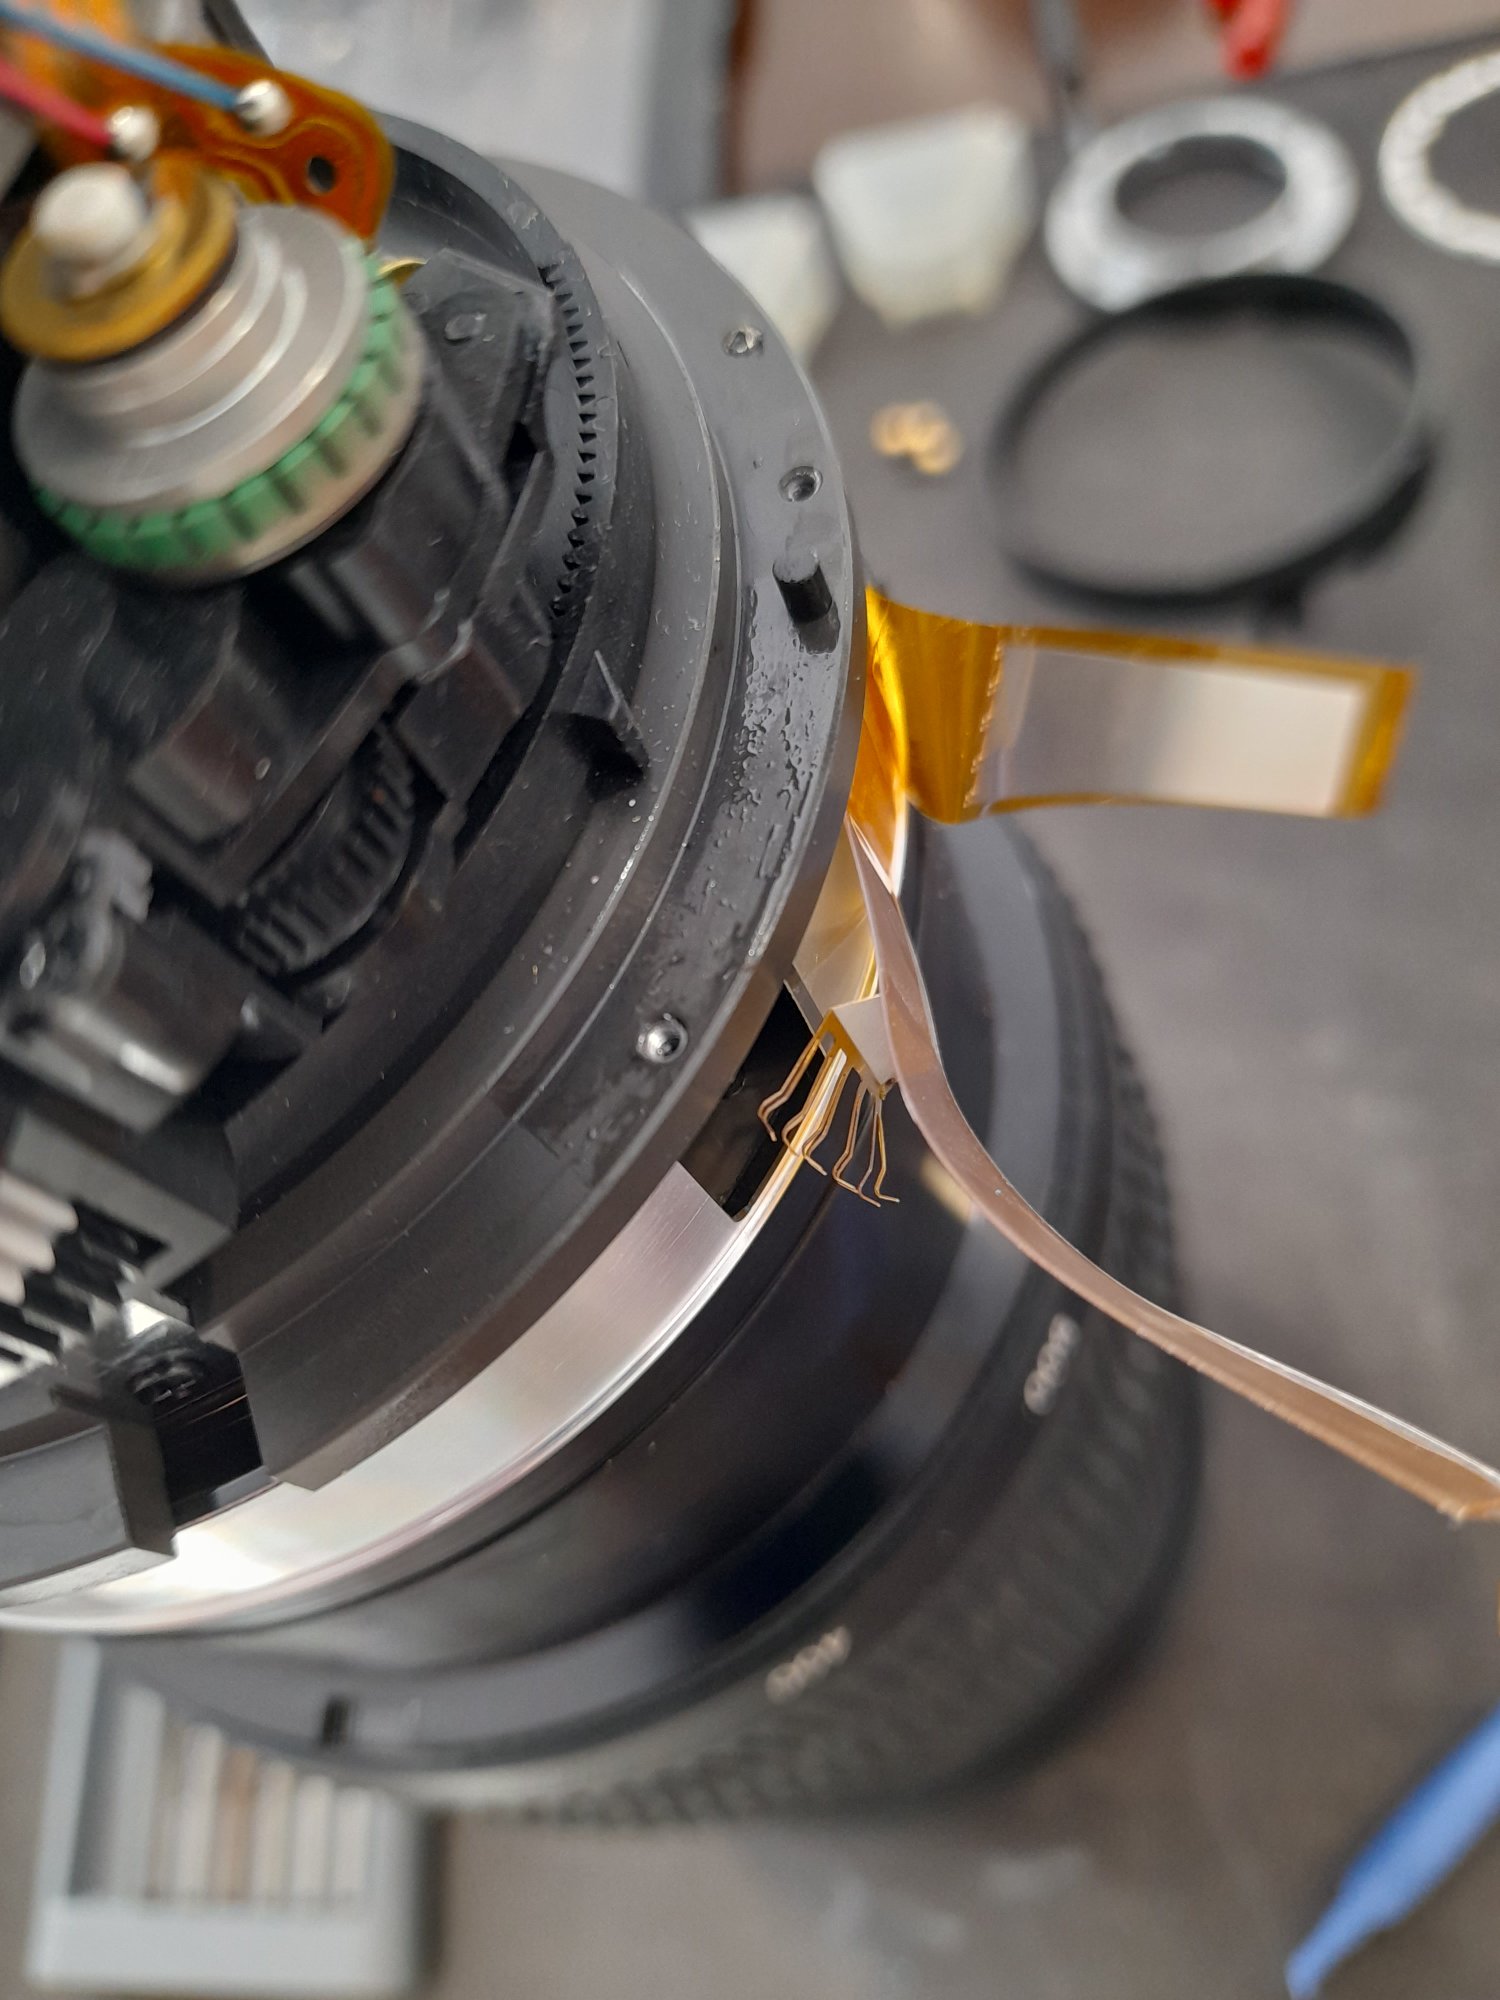
- Very carefully bend them so they'll make contact (you barely need to apply any force to bend them)
- Reassemble - keep the same orange tape but replace the electrical tape (preferably 6mm wide) - the top part of the silver ring that tape is on needs to be clear so the small copper piece we removed earlier can make contact - if your tape is too wide it's fine if it runs off the bottom of the silver ring a little.
- Test - take photos at varying focal lengths and confirm they report correctly. AF performance at long focal lengths should be restored.
Further help
If you think you have the same problem as me but are having problems / want some extra pointers, please feel free to reach out to me. I took a few photos while dissassembling that might be handy, and tried to film most of the reassembly and would be happy to share if it would help.